Monday, 23 September 2013

Installing the Oracle BI Mobile App Designer


The BI Mobile App Designer is the replacement for the BI Mobile App for Ipads that now lets you build your own BI reporting applications for any mobile device, phone or tablet, even browsers on pc’s.

This is a new feature available in OBIEE from version 11.1.1.7.1 onwards.  If you are only 11.1.1.6x or 11.1.1.7 then you must upgrade/patch to 11.1.1.7.1 before installing this. This blog takes you through the steps of installing & configuring it within OBIEE.

Prerequisite patch

Before it can be installed OBIEE 11.1.1.7.1 needs to be patched with patch number 17004920.

Download the appropriate patch file for your environment from Oracle Support – I’m using Windows 64bit, so I downloaded p17004920_111171_MSWIN-x86-64.zip.

Unzip this into a temporary directory.

Now stop all of the OBIEE services in the way you would normally do for your installation.

In this temporary directory create batch (or shell for linux) file called setpaths.bat (or setpaths.sh)  which we need to set the path and environment variables for the patch correctly. 

Into this file enter the following commands, replacing the <obiee_home> reference on the first line with the actual directory path:

set ORACLE_HOME=<obiee_home>\Oracle_BI1
set PATH=%ORACLE_HOME%\bin;%PATH%
set JAVA_HOME=%ORACLE_HOME%\jdk
set PATH=%JAVA_HOME%\bin;%PATH%
set PATH=%ORACLE_HOME%\OPatch;%PATH%

on Linux this commands should be:

ORACLE_HOME =<obiee_home>\/Oracle_BI1;export ORACLE_HOME
PATH=$ORACLE_HOME/bin:$PATH;export PATH
JAVA_HOME=$ORACLE_HOME/jdk;export PATH
PATH=$JAVA_HOME/bin:$PATH;export PATH
PATH=$ORACLE_HOME/OPatch:$PATH;export PATH

On linux also run “chmod 777 setpaths.sh” to make the script executable.

Now open a command window (in windows open this as “run as administrator”), and cd to your temporary directory and run setpaths.bat (.sh)


Then cd into the 17004920 sub-directory and run ‘opatch apply’


If the verify passes, enter ‘y’ to continue with the patch. It should only take a few minutes.


Leave this window open, you’ll need it again in a mo.

Install Oracle BI Mobile App Designer
There are four steps to installing the Mobile App Designer:
1.      Apply the patch file
2.      Deploy the Mobile App Designer to Weblogic
3.      Setup the Security for the Mobile App Designer
4.      Setup the Apps library

Apply the Oracle BI Mobile App Designer patch
The Oracle BI Mobile App Designer upgrade is supplied as a patch file. So the first step is to apply this patch, in exactly the same way as the previous patch.

This time download patch number 17220944 from Oracle Support – this is platform independent, so the file you will download is p17220944_111170_Generic.zip. Unzip this into your temporary directory.

In the same command window as above cd into the new patch directory and run opatch again. If you closed the command window you will need to reopen it and run the setpaths.bat/sh script again.

There is no prompting on this patch, it just installs straight away.


Do not start weblogic or OBIEE just yet, but leave this window open.

Deploy the Mobile App Designer to Weblogic

Now the Mobile App Designer needs to deployed to the Weblogic web server. To do this run the Middleware Configuration Assistant. 

This started by running  <obiee_home>/Oracle_BI1/common/bin/config.cmd (.sh on Linux)  On Linux you’ll need a GUI/X11 emulator to run this.

Once past the splash screen, select ‘Extend an existing WebLogic domain:


Then select the domain to extend – it should default to the domains directory, so select the domain from under there.


Next check the option “Extend my domain using an existing extension template’, then use the browse button to locate the file <obiee_home>\Oracle_BI1\common\templates\applications\oracle.bimad_template_11.1.1.jar


On the JDBC Component Schema config screen leave the settings as they are and just click next


On the the JDBC Component Schema test screen we don’t want to perform any tests, so just click next again.


There are no Optional Configurations required, so just click next.


On the Configuration Summary screen click ‘Extend’ to begin.


The extension only takes a few seconds. Click Done to close the config wizard.


Enable the Mobile App Designer in Presentation Services


We need to add a new entry to the instanceconfig.xml file for presentation services to make the Mobile App Designer visible to the users.

Go to the directory <obiee_home>\instances\instance1\config\OracleBIPresentationServicesComponent\coreapplication_obips1

edit the file instanceconfig.xml.

Near the bottom of the file locate the </ServerInstance> tag and just before this insert the following lines:

<AdvancedReporting>
    <EnableMAD>true</EnableMAD>
</AdvancedReporting>

Save the file and close your editor.

Setup the Security for the Mobile App Designer

This step updates the system-jazn-data.xml file with the security permissions required for BI Mobile App Designer.

First we need to start WebLogic (but not the managed servers or OBIEE just yet).

From your command window Navigate to the <obiee_home>\user_projects\domains\bifoundation_domain\bin directory and run startWebLogic.cmd (.sh).

and wait for the 'started in RUNNING mode' message.


Once WebLogic is running you need to run a WLST script.  Open a new command window and change directory to the <obiee_home>\Oracle_BI1\bifoundation\install directory

Now run the following command, substituting the <hostname> and <Weblogic administrator name> fields as appropriate:

<obiee_home>\Oracle_BI1\common\bin\wlst.cmd addMADCodeGrants.py t3://<hostname>:7001 <WebLogic administrator name>

Note it’s <obiee_home>\Oracle_BI1\common\bin\wlst.sh… on Lunix


You’ll be prompted to enter the password for the Weblogic Admin user, then the script will complete in a few seconds.


Now complete the start-up of OBIEE.  You can either stop the weblogic server above (stopweblogic.cmd/sh) and perform a full normal start-up of weblogic and OBIEE the way you normally do, or run the following to complete the start-up:

From your command window Navigate to the <obiee_home>\user_projects\domains\bifoundation_domain\bin directory and run startManagedWebLogic.cmd (.sh) with the BI Server name as the parameter:

startManagedWebLogic.cmd bi_server1


Wait for ‘started in RUNNING mode’ message:


Then minimise this window (do not close) and open a new command window and start the opmn:
Change directory to <obiee_home>\instances\instance1\bin   (change instance1 to your instance name if necessary)

And run opmnctl.bat startall  (or opmnctl.sh)


Setup the Apps Library
The Apps library is basically a folder in the catalog from where users can view, manage and subscribe to published apps.

With OBIEE fully started, open a browser and login using an administrator user, then go to the Catalog and select Shared Folders.


Use the new icon  in the menu bar and select Folder.


Enter a names for the Apps Library (it doesn’t have to be “Apps Library”!)


Under the new Apps Library folder, select More, then Permissions


At the moment you will not have any groups specifically aimed at BI Mobile users, so for now leave the permissions as they are:


Administrators can create content, BI Consumers can access it. As you build BI Mobile Apps you may grant specific permissions to individual users or create application/catalog groups to manage these user. You will need to come back to this screen to set the necessary permissions when you do.

Finally the folder you have created needs to be registered to act at the Apps Library.

Using a text editor, edit the xmlp-server-config.xml file in the directory:

<obiee_home>\user_projects\domains\<bifoundation_domain>\config\bipublisher\repository\Admin\Configuration

Substitute <bifoundation_domain> for your domain name.

Add a line for the APPS_LIBRARY_FOLDER_LOCAL property before the </xmlpConfig> tag.
Replace with value with the name you gave the directory above.

<property name="APPS_LIBRARY_FOLDER_LOCAL" value="/Apps Library"/>


Save the file.

Verify the installation

To verify the installation has worked, simply click on the OBIEE New dashboard link and see if ‘Mobile Application’ -> ‘Mobile App’ exists:


In a few seconds the Wizard should begin…choose type of mobile device…


Then the data source…

 
Save it in your Apps Library folder…


And start to Create…


Over to you…Enjoy!


Wednesday, 10 April 2013

Upgrading OBIEE 11g to 11.1.1.7 - ** STOP PRESS **

Having now performed both and upgrade and a fresh install of 11.1.1.7 and compared the two I can report that the upgrade does not entirely work - it seems to miss off or not completely install some components.

I'd already mentioned that the Essbase components were not included in the upgrade and this is perfectly ok - you'd want to install Essbase in a seperate middleware home anyway (if not a separate server), however some other new features don't seem to work after the upgrade and I can only assume the upgrade process doesn't install the components correctly.

An example is the new percentage tiles. the upgraded version doesn't have the correct screen when editing percentage tiles - it tries to edit them in the pivot table editor and it doesn't quite work properly - there isn't even any 'done/revert' buttons to save/discard your changes.

I also had a problem with drilling not working - clicking on a dimension value to drill down in a pivot table didn't do anything - even on a report which worked perfectly ok before the upgrade. This may be a problem specific to my environment, I've no way of knowing, but I don't have time to investigate it.

I'm going to keep my upgraded environment (it was only a test environment) and when the next patch set comes out see if that fixes these issues - upgrading would still be an easier option than reinstalling especially if there were lots of custom configurations. For now though if anyone wants to upgrade I'd recommend a re-install.


Monday, 8 April 2013

Upgrading OBIEE 11g to 11.1.1.7


The new version of OBIEE, 11.1.1.7 was released last week with a whole host of new features – an updated look and feel, enhancements to tables, graphs & dashboards, support for Endeca and enhancements to Essbase integration. For the full list see the Oracle documentation at the following URL:


The installation process for a new installation appears almost identical to 11.1.1.6 with a few extras on the install screens for Essbase which is has now been combined into the OBIEE install set. Rather than run through that I thought I’d try my hand at upgrading an existing 11.1.1.6.x installation, so below is the (remarkably painless) process I went through – successfully completing the upgrade in a couple of hours.

The environment I upgraded was an OBIEE 11.1.1.6.0 patched to 11.1.1.6.6 on Windows 2008 64bit server that had been configured with AD authentication and auto start up with window services.
I started with downloaded the usual zip files from technet, in this case the following and unzipped them to a single temporary directory.

bi_windows_x86_111170_64_disk1_1of2.zip
bi_windows_x86_111170_64_disk1_2of2.zip
bi_windows_x86_111170_64_disk2_1of2.zip
bi_windows_x86_111170_64_disk2_2of2.zip

There are three basic steps to the upgrade:


  1.   Perform a software only install of the new version 
  2.   Run the Patch Set Assistant to configure Weblogic 
  3.   Run the Configuration Assistant for OBIEE


To start with I manually shutdown all OBIEE and Weblogic services:


For the duration of this upgrade I actually set these services to manual so I could test the upgrade and start up procedures separately. I’ll put them back to automatic at the end.

From the directory where the upgrade files where unzipped, go into the bishiphome\Disk1 subdirectory and run setup.exe (if you are not logged in as Administrator, right click and select ‘run as administrator’ – I never do, I prefer to install software under a ‘oracle’ account with Admin access)


This brings up the usual OBIEE installer screen:


I never enable software updates, I prefer to control them myself, so I turn this option off.


The upgrade process initially only requires the software to be installed, the configuration will be handled later on.


The prerequisite checks passed ok…


It detected the Oracle Middleware Home by itself. If you had more than one home on the server you would probably need to choose the correct one. The Oracle Home Directory should be Oracle_BI1. 


As OBIEE only used Weblogic, this should be auto selected.


 The summary screen then lists what’s going to be installed.

 
The installation progress image still shows Lawrence Fishburne in one of his less action packed roles…


 And the install should finish successfully…


That’s the new version of the software installed. Now to configure it. The first step is to use the Patch Set Assistant to upgrade Weblogic and the repositories. Before doing this it’s advisable to take a backup of the database repositories – the xxx_BIPLATFORM and xxx_MDS schemas for the environment being upgraded.
 
From the middleware_home/oracle_common/bin directory run psa.bat (again choose “run as administrator” if necessary)


 Choose Oracle Business Intelligence to upgrade.


Before continuing you need to confirm that you’ve taken a backup of the database repositories and that the database is of a version supported by this version of weblogic. You can check the support versions at the following URL:


From here you can download the excel certification spreadsheet for OBIEE 11.1.1.7, but in a nutshell the following database versions are supported: 10g 10.2.0.4 or better, 11gR1 11.1.0.7 or better and 11gR2 11.2.0.1 or better.


Enter the connection details for the xxx_MDS schema and click Connect


The xxx_MDS schema name will appear in the Schema user name field. Note that if this database has the repositories for more than one OBIEE environment you must make sure the correct one is selected. Enter the password for this schema.


This step is repeated for the xxx_BIPLATFORM schema, again make sure the correct one is selected.


The PSA will then examine the repositories to make sure they are ok for upgrading.

 
Finally you get the summary screen from where you can start the upgrade


The upgrade process only takes a few seconds to perform.


Click close.
Now start Weblogic and the Node Manager.
From middleware_home\user_projects\domains\bifoundation_domain\bin directory run startWebLogic.cmd


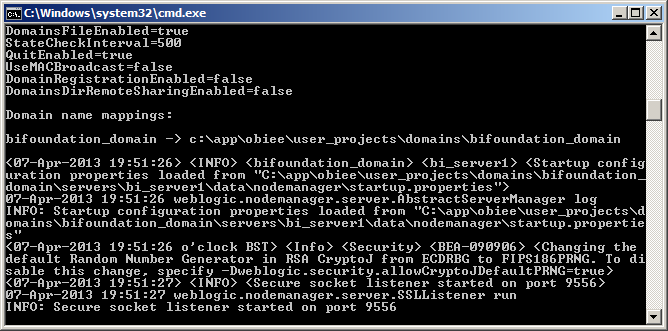
 Then the node manager:  middleware_home\wlserver_10.3\server\bin\startNodeManager.cmd


Now we need to run the Business Intelligence Configuration Assistant.
From middleware_home\Oracle_BI1\bin run config.bat (again choose “run as administrator” if necessary)


The prerequisite checks should pass ok (they did in the install earlier…)


Choose the Update BI Domain option and enter the connection details for the Weblogic server.


 The details of the BI Domain should be picked up automatically


Again the summary screen appears before the upgrade begins.


 If took around 20 minutes to perform the upgrade, stopping and starting services a few times along the way.


And finally completes ok.


That’s it, the upgrade is complete. A quick check of the version number in the Administration screen:


Rebooting the server and starting the BI services manually revealed one minor problem:
The boot.properties file had been deleted under:

middleware_home\user_projects\domains\bifoundation_domain\servers\AdminServer\security

Although the boot.properties file under:
middleware_home\user_projects\domains\bifoundation_domain\servers\bi_server1\security 

was still intact. For good measure I recreated both. (They just have two lines: username=weblogic, password=password

The look and feel has been improved…but playing will have to wait for another day…


Importantly the two custom configurations I mentioned at the top of this blog – starting OBIEE via windows services (after returning the services back to automatic) and the AD authentication both worked perfectly after the upgrade without any additional changes, so existing configuration settings have been retained correctly. Given the change to the look and feel I’d be surprised if customisations to the look and feel (e.g. logo’s, alternative colours etc.) are still perfect after the upgrade, I suspect some tweaking would probably be needed, but it should be fairly minor.

I also can’t see any sign of the Essbase tools that a normal install includes, but that’s probably not a bad sign – even though Essbase is included with the OBIEE installation I’d still recommend splitting Essbase off onto a different server, or at very least a different middleware home on the same server. Later on I’ll re-run the installer to add in Essbase and see how that goes.